Pages

Tuesday, December 24, 2013

Creamy Tomato Soup

Nothing tastes better when it is cold outside than soup.  I remember asking my grandmother for her tomato soup recipe and I was really surprised when she told me what it was.  She just used canned condensed tomato soup and used milk instead of water.  It was so creamy and delicious. This is an easy delicious soup that reminds me of her.  I served this with provolone and salami grilled cheese sandwiches.  I love to dip it in the soup!

Ingredients:
  • 1/3 Cup finely diced onion
  • olive oil
  • 1 Tablespoon butter
  • 1 can (29 oz) tomato sauce
  • 2 cans (28 oz each) whole peeled plum tomatoes 
  • 1/2 teaspoon Salt
  • 1/4 teaspoon Pepper
  • 4 Tablespoons Sour Cream (or more depending on how creamy you would like it)
  • 2 teaspoons of sugar
Drizzle some olive oil in the bottom of a large soup pot.  Heat olive oil and butter until butter is melted.  Add onions and garlic and cook for about 3 minutes.  Dump in tomatoes and tomato sauce.  Bring to a boil and simmer for about 10 minutes.  Using an immersion blender, blend soup until smooth.  Add salt, pepper, and sugar.  Stir in sour cream.  Simmer for a few more minutes and serve.

Follow the Magical Moms on Facebook and Pinterest for weekly menu ideas, crafts, and Disney Magic.  

Cheesy Ham and Spinach Spirals

A few nights ago I went with a friend to a Pampered Chef training event.  I enjoyed sampling all of the goodies.  I came away with a few new things that I wanted to try.  This is one of them.  I made it and brought it as an appetizer for a cookie exchange.


Ingredients:
  • 1 tube of Crescent Roll Dough
  • 4 oz Chive and Onion Cream Cheese (at room temp)
  • 8 to 10 Slices of Deli Ham
  • Baby Spinach Leaves (a couple handfuls)
Preheat oven to 375.  Roll out dough.  If you use the sheet kind you will just flatten a little bit.  If you use the actual roll kind you will have to pinch the perforated cuts together.  Spread the softened cream cheese on the dough.  Layer with ham and then baby spinach leaves.  Roll the up dough (short side to short side) tucking the ham and spinach in as you go.  After it is rolled up pinch the edge with the roll to seal it.  Slice with shape knife and place on a baking sheet lined with parchment paper.  Bake for about 10 minutes.
Follow the Magical Moms on Facebook and Pinterest for weekly menu ideas, crafts, and Disney Magic.  

Friday, December 13, 2013

My Disney Experience App Review


The new My Disney Experience App helps you to navigate the parks like a pro.  You can access it before your trip or while in the middle of the MAGIC.  The app works in conjunction with Magic Bands to make FASTPASS+ selections.  Create a list of your "MUST DO" experiences and check out the dining options.  The app gives you SO much information.  If you are planning a trip soon familiarize yourself with this app you will be amazed what you can find on it!

Follow this link to read MY professional review of the app on the Wirefly Blog.

Follow the Magical Moms on Facebook and Pinterest for weekly menu ideas, crafts, and Disney Magic.  

Saturday, December 7, 2013

Snowman Hat Centerpiece

 I enjoy being crafty with items I already have in the house because let's face it, being crafty can be expensive.  Using leftover supplies from previous projects and repurposing other items is a great way to keep costs down.  This project didn't cost me a penny because I had everything already.  Work with what you have at home, here are my basic instructions.

Materials:
  • Coffee Can
  • Black Plate or Charger
  • Black Spray paint
  • Red Ribbon
  • A Small handful of fake snow
  • A Sprig of Holly
Spray paint empty coffee can and plate (or charger) with black spray paint.  Let it dry.  Tie a piece of red ribbon around the coffee can.  Set can on plate.  I did not attach the can to the plate because I wanted to be able to take it apart for easy storing.  Tuck a piece of holly into the ribbon and sprinkle a little bit of fake snow on it.  That's it, easy peasy!
Follow the Magical Moms on Facebook and Pinterest for weekly menu ideas, crafts, and Disney Magic.  


Panko Garlic Shrimp

Cooking shrimp can be intimidating for some, but this is a fool proof anyone can do it recipe that is sure to please everyone!  I served this with Cajun Seasoned French Fries and it worked out perfect because they are both baked at the same oven temperature.  
Ingredients:

  • 1-1.5 Lbs of Shrimp
  • 2 teaspoons Minced Garlic
  • 2 Tablespoons White Wine
  • 1/2 Cup Panko Bread Crumbs
  • 4 Tablespoons Melted Butter
  • 2 teaspoons Dried Parsley
Serves 4

Preheat oven to 425.  Place shrimp in baking dish.  Add in garlic and wine.  Toss them around a bit to make sure that they are coated.  In a small bowl combine melted butter, panko, and parsley, use fork to mix.  Sprinkle crumble mixture evenly over shrimp. 
 Bake for about 15 minutes or until shrimp have turned pink  and opaque and are cooked through.  

Follow the Magical Moms on Facebook and Pinterest for weekly menu ideas, crafts, and Disney Magic.  


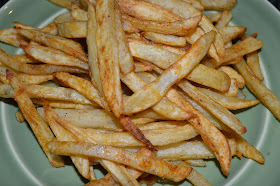
Cajun Seasoned French Fries

Ingredients:
  • 1 Tablespoon Olive Oil
  • 4 Russet Potatoes
  • 1 teaspoon Cajun Seasoning
  •  Sea Salt
Bring a large pot of water to boil.  While the water is heating, cut the potatoes into french fry size pieces (about 1/4" thick).  When the water comes to a boil add the fries, turn off the water, and set the timer for 3 minutes.  After the three minutes is up, remove the fries from the water and lay them on a paper towel to dry.
 Preheat oven to 425.  Put the fries in a large bowl, drizzle with olive oil, and sprinkle with Cajun seasoning.  Toss to coat.
Place on baking sheet that is coated with cooking spray, sprinkle with sea salt, and bake for 15 minutes.  Using a spatula flip the fries and return them to the oven to back for an additional 12-15 minutes flipping one more time. Cooking time will vary depending on the thickness that you cut your fries.

Follow the Magical Moms on Facebook and Pinterest for weekly menu ideas, crafts, and Disney Magic.  

Friday, December 6, 2013

Better than Rice-a-Roni Broccoli Cheddar Rice

For many years I made rice from Rice-a-Roni packets with the seasonings included, I am not saying that I don't ever make them or that they don't serve a purpose but this recipe is better and doesn't have all the weird ingredients.  This rice dish is an excellent way to get the kiddos to eat some veggies.  Feel free to put more broccoli if you would like!  

Ingredients:
  • 1 Cup Orzo
  • 1 Cup Rice
  • 1 Cup Broccoli- Chopped Small
  • 1 Cup Shredded Cheddar Cheese
  • Salt
  • Pepper
  • 2 Tablespoons Olive Oil
  • 2 Cups of Chicken Broth (or vegetable broth)
  • 2 Tablespoons Butter
In a sauce pan combine orzo, rice, and olive oil.  Toast rice over med-high heat for about 3 minutes.  Pour in chicken broth and bring to a boil.  When it starts to boil reduce heat to low, cover, and simmer for 10 minutes.

Add the broccoli, cover, and cook for additional 3 minutes.  This cooks the broccoli.  Add cheese and butter- stir.  Cover and let sit for a couple minutes while butter and cheese melt.  Stir and salt and pepper to taste.

I served this with Red Hot Chicken Kabobs
Follow the Magical Moms on Facebook and Pinterest for weekly menu ideas, crafts, and Disney Magic.  


Thursday, December 5, 2013

Red HOT Chicken Kabobs

My husband often asks me to make boneless chicken wings which I don't mind doing, but they take a little bit of time and effort to make.  I never have enough time to get to everything so today I decided I was going to take a short cut and make a spicy grilled chicken to tide him over until I have a chance to make exactly what he wanted.  Plus this is probably going to be one of the only days nice enough to grill outside... it is December after all!

Ingredients:
  • 3 Boneless Chicken Breasts (Cut into large chunks)
  • 1 teaspoon Minced Garlic
  • 3/4 Cup Franks Red Hot
  • Juice from 1 Lime (about 1/4 cup)
  • 2 Tablespoons Olive Oil
Combine all ingredients except chicken and mix well.  Pour marinade over chicken and refrigerate for about an hour.  Place chicken on skewers and grill until cooked throughout.

I served this with Better than Rice-a-Roni Broccoli and Cheddar Rice.

Follow the Magical Moms on Facebook and Pinterest for weekly menu ideas, crafts, and Disney Magic.  


Wednesday, December 4, 2013

Baked Soft Taco Roll Ups

Switching up the way we eat tacos is nothing new,  tacos are a family favorite and this recipe did not disappoint.  This recipe is a little spicier than some of the others that I make, but that can be easily fixed if you don't like things quite as spicy as I do by adding less jalepenos to the mix.  I had a tough time coming up with something to call this dish... I don't know all of the technical aspects of what a taco, burrito, enchilada... I just know delicious!

Ingredients:
  • 2 Chicken Breasts cooked and shredded
  • 1/2 Cup PepperJack Cheese
  • 1 Cup Mild Cheddar Cheese (divided)
  • 2 Tablespoons of diced Jalepenos (I use the sliced kind from a jar and just chop them up a bit)
  • 1/2 of Corn
  • 1 Cup of Sour Cream
  • 1/3 cup of salsa
  • Cayenne Pepper
  • 3/4 teaspoon of Cumin
  • 1 teaspoon of Salt
  • 1/2+ 1 teaspoon Minced Garlic
  • 1/3 Cup of Canola Oil
  • About 10 8" Flour Tortillas (you can use bigger ones if you would like)
  • Optional- serve with a side of shredded lettuce, sour cream, or salsa 

Serves 5

In a small sauce pan add canola oil and 1 teaspoon of minced garlic.  Bring oil to a simmer, this will happen pretty quick because this is not a lot of oil.  Turn off heat and let sit about 10 minutes so that the garlic infuses the oil with flavor.  While that is cooling, combine pepper jack, 1/2 cup mild cheddar, corn, sour cream, jalepenos, cumin, salt, 1/2 teaspoon minced garlic, salsa, and shredded chicken in a large bowl.  Mix well.

Preheat oven to 400.  Place about 1/4 cup of the mixture on one of the tortillas and sprinkle a little more cheese on top.
Fold sides in and place seam side down.  Repeat until all mixture is used.  Then lightly brush each of the roll ups with the garlic olive oil and sprinkle a dash of the cayenne pepper on each one.  I lined my baking sheet with parchment paper for easy clean up!
Bake for 10-12 minutes flipping halfway through.  The baking time will very depending on the size of the tortillas that you use.  You will know they are done when the edges of the tortillas are crispy.
Follow the Magical Moms on Facebook and Pinterest for weekly menu ideas, crafts, and Disney Magic.  

Christmas Fills our House with JOY

This year I decided that the mantel needed a little change.  I always ooh and ahh over Christmas decorations I see in magazines and on Pinterest, but year after year I have been getting out our decorations and putting them in almost the same exact spot every year.  This year I decided I was going to do it different and that I wasn't going to spend a lot of money even though I was changing it up.

The only new decoration is the JOY, it was so simple to make and it cost less that $5.  The other items are decorations that I would have normally put somewhere else.  I am very happy with the way it turned out!

Materials:
  • Wooden Letter "J"
  • Wooden Letter "Y"
  • Grapevine Wreath
  • Paint- I used one called Apple Spice
You can use any size letters.  I used 10" letters and an 8" Wreath
Follow the Magical Moms on Facebook and Pinterest for weekly menu ideas, crafts, and Disney Magic.